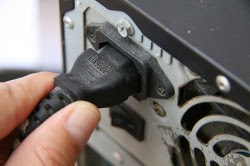
Choose and Install RAM on the PC - One way to increase the speed of the Personal Computer (PC) is to increase the capacity of RAM or commonly known as RAM upgrades. Generally, to upgrade the RAM, we carry our computer unit all the way to the computer store or to place a computer service that is certainly less practical.
Previously we have tries to install RAM on a computer, for more details, we will discuss on how to choose and install RAM on a computer. But if you decide to do it yourself, is easy enough. Here's how to select and install the RAM on your PC:
Previously we have tries to install RAM on a computer, for more details, we will discuss on how to choose and install RAM on a computer. But if you decide to do it yourself, is easy enough. Here's how to select and install the RAM on your PC:
1. Check the type of RAM
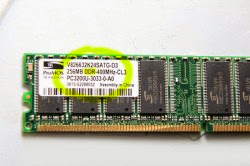
Identify the type of RAM your computer needs, with the first disconnect all electrical connections on your computer, then open the casing, and pull out the RAM (Step 4). On-chip RAM is generally no label that indicates the type of RAM eg DDR I, DDR II, or DDR III. Then pay attention to the type of PC2700 or PC3300 eg PC, and do not forget the speed such as 1 GB of RAM, 2 GB, and so on. It is also important to know how the number of ports available RAM if you want to buy more than one piece.
2. Select brand of RAM
To buy chip RAM, you can do it online or by coming directly to the computer store. Make sure when you buy online, the RAM can be restored when the wrong type or manufacturing defects. When you buy directly in stores, you can bring your old RAM chips and showed it to the salesman to find the appropriate RAM to your computer. Select brand RAM according to quality and your funds, make sure there is a warranty and easy to claim.
3. Disassemble the computer unit
Before we disassemble the computer, make sure all power cords are connected to the computer uprooted. Now, you can open the case side by removing the bolts that regard. Once open, lay your computer unit for easy installation. Make sure the body, hands, and tools you are not wet or contain static electricity as this can damage parts of your computer.
4. Note the RAM slots
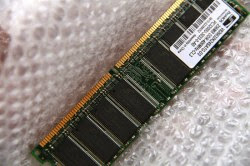
RAM slots are usually located in the upper right on the motherboard, the motherboard usually has 2 to 4 slots of RAM. This RAM plugged into the motherboard, chip RAM size is about 4 cm x 15 cm. If there is still an empty slot, you do not need to unplug the RAM, just plug in any new RAM into the empty slot. Previously, when there is no paper or manual contained in the purchase of the RAM box, first read, may be listed other things to consider in installing RAM you just bought.
5. Installing and Revoking RAM
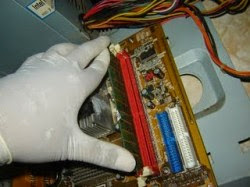
Usually a few motherboards now have locks so tightly bound RAM on the motherboard, make sure to unlock it first before removing the RAM. Hold the corner chip RAM to pull out, do not touch the surface of the chip or connector.
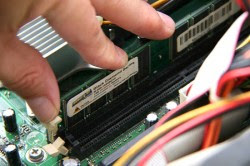
The same thing applied when installing the RAM, but you really will not be any pairs of RAM because RAM is certainly mounting position. When upside down, the chip will not be able to fit into the slot on the motherboard. So when was difficult to enter, meaning the RAM wrong position. After finding the right position, attach the RAM slots on the lips and press gently into the slot. Make sure the RAM in completely and all the locks are already tightly bind RAM.
6. Check out the success of the installation process
After neatly installed RAM, lightly wipe the entire motherboard from dust with a very soft brush or canned air compressor, plug everything before you dismantle, including casings, bolts, electrical connections and cables completeness others. Turn on the computer and will display a message that there is a new RAM has been installed along with capacity. Sometimes the computer calculates the specific RAM, up to the capacity which sometimes appear slightly different from what we buy, such as 2 GB, may be counted only be 1.99 GB or more.
7. Test the application
Open and close the applications you normally use, when it feels the process is faster then your upgrade a success. If not faster or even slow down, there must be something wrong with the RAM or you put too much chip RAM.
8. Re-check the last time
Lastly, before you use your computer with new RAM, check the RAM installed on the system settings menu. This can be done by pressing the Windows key on the keyboard along with the Pause / Break key is usually located at the top right of the keyboard. The menu system will open and show the capacity of installed RAM.
Easy is not it? Instead you bother bringing your big CPU unit to the computer store with the risk of falling, attach themselves to follow the way of RAM you select and install the RAM on this PC. Good luck.
